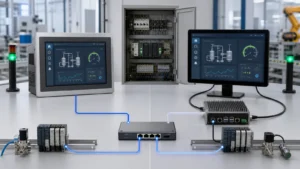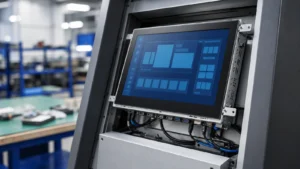
A practical integration method covering stack-up definition, air versus optical bonding, tolerance and pressure control, LCD noise coupling, FPC routing, and tuning in the completed device.
Quick answer: how do you integrate a PCAP touchscreen with an LCD?
Start by freezing the LCD active area and outline, PCAP active area, cover-glass window, bezel overlap, adhesive or air-gap stack, FPC exit, enclosure thickness, and environmental requirements. Use a complete tolerance chain—not one nominal alignment value—to protect the visible and touch-active areas.
Then choose air bonding or optical bonding based on optical, environmental, process, repair, and reliability needs. Route the touch FPC away from LCD timing and backlight switching nodes. Finally, capture raw channel data and tune the controller in the fully assembled device under worst-case display, power, and environmental states.
Freeze the integration inputs before detailing the stack
| Design input | What must be controlled | Why it matters |
|---|---|---|
| Optical geometry | LCD active/viewing area, PCAP active area, black-mask opening, bezel overlap, parallax requirement. | Prevents visible clipping, unusable edge zones, and alignment failures at tolerance limits. |
| Mechanical stack | Glass, adhesive/air gap, foam/gasket, LCD, brackets, enclosure, fasteners, flatness, and thickness tolerance. | Defines pressure distribution, minimum clearance, and assembly repeatability. |
| Electrical architecture | Controller, interface, supply rails, reference/ground, shield strategy, LCD timing, backlight PWM, FPC routes. | Determines coupling paths and available noise margin. |
| Use environment | Temperature, humidity, condensation risk, UV, glove/wet-touch needs, cleaning and ingress boundary. | Drives material, sealing, venting, tuning modes, and validation conditions. |
| Manufacturing process | Cleanliness, bonding equipment, alignment capability, cure/debubble window, inspection, rework, traceability. | Turns a working prototype into a repeatable module. |
Select air bonding or optical bonding from project evidence
| Stack option | Advantages | Main engineering risks |
|---|---|---|
| Air bonding / mechanical separation | Lower process complexity, easier repair, and less adhesive-material dependence. | Internal reflection, parallax, cavity contamination or condensation, variable clearance, and pressure transfer through the mounting structure. |
| Optical bonding with OCA or LOCA | Reduced internal reflection and parallax; potential readability and mechanical-integration benefits. | Cleanliness, material compatibility, thickness control, cure/debubble window, bubbles, delamination, yellowing, rework, and dielectric impact on touch channels. |
OCA and LOCA describe process/material families; neither name guarantees an outdoor, low-temperature, or industrial reliability grade. A suitable formulation must be selected using measurable properties and the actual assembly process.
- Review transmittance, haze, refractive index, yellowing, and compatibility with the LCD polarizer, cover-glass ink, coatings, and sealants.
- Review service/storage temperature, glass transition behavior, moisture absorption, UV resistance, and adhesion retention after cycling.
- Evaluate bond-line thickness and dielectric properties against PCAP baseline and touch-signal margin.
- Confirm panel size, curvature or step geometry, cure method, equipment capability, takt time, rework path, and supplier process window.
For a focused comparison of bonding options, see Air Bonding vs Optical Bonding for Touch Displays.
Control pressure, flatness, and the full tolerance stack
Mounting foam or gasket should be specified by material grade, thickness, Shore scale, compression range, width, environmental rating, and tolerance. Writing only “30–40 degrees” is incomplete because the Shore scale and compression state determine the mechanical result.
Avoid point load
Fasteners, clips, ribs, and gasket joints should not transmit concentrated force into the LCD active area. Local load may cause mura, water-wave artifacts, light leakage, glass stress, or touch baseline changes.
Design for tolerance extremes
Check minimum clearance, maximum compression, glass/LCD flatness, enclosure warp, adhesive thickness, and fastener torque together—not as isolated nominal values.
Define the cavity boundary
For air-bonded assemblies, manage contamination, moisture, and pressure equalization at the enclosure level. A hydrophobic vent belongs in a designed enclosure cavity, not inside an optical bond line.
Verify after sealing
Ingress gaskets and perimeter adhesive can change pressure and stiffness. Repeat optical and touch tests after the final sealing process and enclosure closure.
Control electrical coupling from the LCD and backlight
LCD source and gate drivers, VCOM, panel DC/DC converters, and backlight PWM can couple into the PCAP sensor through electric fields, shared supply/return impedance, or cable common-mode current. The worst state may be a particular image, refresh rate, or PWM duty—not maximum brightness.
- Separate the touch FPC from LCD ribbon cables, high-speed clocks, VCOM-related nodes, and the backlight boost-converter switching loop.
- If crossing is unavoidable, cross near orthogonally and avoid a long parallel overlap.
- Do not apply an unconditional “2 mm minimum” rule. Required spacing depends on field strength, shielding, stack-up, channel margin, and production tolerance.
- Control supply branches, filters, and return paths even when LCD and touch share a system reference.
- Select capacitors, ferrites, and common-mode components using loop stability, rated current, and frequency impedance, then recheck startup, ripple, and temperature rise.
- Where supported, evaluate display synchronization, frequency hopping, or noise detection against the final LCD timing and keep comparison data with the function disabled.
Tune the controller in the completed assembly
Parameters developed on a bare sensor do not represent the final product. Cover glass, adhesive, LCD, metal bezel, conductive foam, enclosure, and cable routing all change channel baseline, noise, and touch signal.
Capture raw data first
Save per-channel baseline, noise, touch delta, and edge behavior for the bare module, intermediate stack, and complete enclosure.
Exercise the display
Use black, white, checkerboard, scrolling patterns, video, and static images across supported refresh rates and backlight/PWM states.
Exercise the system
Test approved adapters, USB or communication links, maximum load, standby/wake, charger states, and relevant wireless-transmit conditions.
Configure by mode
Set thresholds, scan frequency, edge compensation, glove/wet mode, debounce, and baseline tracking from measured margin. Do not use one aggressive setting for every use case.
Evidence-based troubleshooting and release checks
| Symptom | Likely source | Verification approach |
|---|---|---|
| Mura or water-wave effect | Local pressure, excessive gasket compression, enclosure warp, or bond stress. | Inspect force distribution; relax fixation points one at a time; recalculate the tolerance and compression stack. |
| False touch changes with image content | LCD timing/VCOM/supply coupling, parallel FPC route, or scan-frequency conflict. | Change image and refresh state; compare channel noise and spectral behavior; adjust routing or supported sync/frequency settings. |
| Sensitivity falls after bonding | Bond-line thickness/dielectric change, cover stack, or bare-module parameters retained. | Compare pre/post-bond baseline and SNR; retune only in the final stack after confirming material and process control. |
| Bubbles or edge delamination | Cleanliness, surface energy, material mismatch, cure/debubble process, or edge sealing. | Perform batch and cross-section analysis; return to the validated material/process DOE rather than applying uncontrolled local heat or pressure. |
| Fogging after temperature change | Moist air in an air-bonded cavity, pressure-balance/seal design, or material moisture uptake. | Distinguish an enclosure-cavity failure from an optical-bond interface failure before selecting the corrective action. |
Release checklist
- Drawings freeze the active/viewing areas, bezel mask, FPC exit, bond/air-gap thickness, and assembly tolerances.
- Cleanliness, ESD controls, alignment, bonding, cure/debubble, inspection, and rework windows are validated.
- Power ripple, return paths, FPC route, and shield connections have controlled revisions.
- The final assembly passes full-area touch tests across display, power, adapter, and rated environmental states.
- Reliability, mechanical stress, and applicable IEC 61000-4 / IEC 60068-2 methods use project-defined conditions and criteria.
PCAP and LCD integration FAQ
Is optical bonding always better than air bonding?
No. Optical bonding can reduce internal reflection and parallax, but it adds material, cleanliness, process, repair, and reliability constraints. Choose from the application requirements and verified process capability.
How much distance is required between the touch FPC and LCD cable?
There is no universal value. Establish spacing from the actual LCD emission, cable geometry, shielding, touch-channel margin, mechanical tolerance, and final-assembly comparison tests.
Can the PCAP be tuned before the enclosure is ready?
Early tuning is useful for development, but release parameters should be derived and verified after the final cover, adhesive, LCD, bezel, chassis, cable routing, power supply, and software timing are present.
Building a PCAP + LCD display module?
Send the LCD and touch drawings, cover-glass stack, bonding choice, bezel concept, controller/interface, environment, and target validation conditions. EverGlory can review the stack-up before tooling or pilot build.
Request an Engineering ReviewView Touch Display Modules